Showing posts with label hiking. Show all posts

Friday, June 22, 2018

Travel: Seneca Rocks, West Virginia

The view from the Seneca Rocks Discovery Center. 
This past week I hiked the Seneca Rocks trail. I didn't give up and I made it to the top! It was a glorious feeling of accomplishment and a wonderful adventure in a beautiful setting. It was beautiful and you can be sure I'll go back. 

Due to the time of day (nearly noon), getting wet, and the haze from the heat of the day, my photos don't do justice to the beauty of the area. 


What the Seneca Rocks Trail IS:


  • Seneca Rocks is an unincorporated community in Pendleton County, West Virginia (at the intersection of route 33 and route 55)
  • Seneca Rocks is a rock formation located within the Monongahela National Forest. 
  • The hiking trail can be accessed from the Seneca Rocks Discovery Center or the Homestead Site and Picnic area.
  • The hiking trail is 1.3 miles and climbs over 700 feet
  • The trail is a wide, maintained, path of uphill and switchbacks.
  • There are occasional benches and two sets of stairs in one particularly steep location
  • The observation deck is near the top of the rock formation and is cantilevered over the land below. The views of the area below are beautiful.


What the Seneca Rocks Trail and Observation Deck Is Not:


  • The observation deck is not at the top of the rocks, as I had hoped.
  • The view is not of the rocks, as I had hoped. I had hoped for a glimpse of rock climbers. The "view" is the same view you would have from the rocks of the valley and ridges below. 
  • If you are a serious hiker and prefer difficult trails, this is not what you are looking for. The difficulty on this trail is the climb. Otherwise, it is like a stroll on a wide, civilized gravel path. 


My Experience at Seneca Rocks


I felt a little rushed as I had left the dogs alone at The Shack and I was concerned they'd get too hot with only the windows open (instead of the doors hanging wide open like they do when I'm there).  I hadn't really planned on taking this hike during this trip to The Shack. But there's no time like the present, right? So off I went. I'm glad I did. But next time I'll be better prepared with my backpack, binoculars, and a picnic lunch.

My GPS didn't pull up "Seneca Rocks" but it did pull up the nearby town of Macksville. The winding two lane highway offered beautiful views for the 1 1/2 hours I drove from The Shack.

When I arrived, I found there were two parking areas, and initially I was confused. There was the Discovery Center parking area and the Picnic area at the Sites Homestead. However, both areas are connected by a bridge and a path. 

The Discovery Center provided a bench and a wonderful view of the rocks. Were it not for feeling rushed, I would have sat for awhile. The Discovery Center offered a continuously running movie, excellent bathrooms, a gift shop, and some information about the rocks and about invasive plant species in the area. 

The Sites Homestead and picnic area provided a parking lot, covered picnic area, a rustic park bathroom, and the old homestead house and garden area. 


The Sites Homestead and gardens

The hiking path started up and over a bridge. Initially, the path was flatish, and I thought to myself, "at this amount of rise, it's going to take all day to get to the top". Well... I spoke to myself too soon. The climb began. I had to take frequent breaks. And there seemed to be far more switchbacks than shown on the map. 

During one of my breaks, on a bench in a switchback trying to catch a breeze, hikers coming down the hill encouraged me. "It's not very far now", "you've got this", and "only two more switchbacks".  They were right, two more turns and I was at the observation tower.

Note: if you make the hike, know that if I can do it, you can too. Just go slow and steady, drink water, and take frequent breaks if you need to.  If you get to the bench in the switchback you are getting close. When you get to the stone "wall" in the switchback, you have completed your last turn. The deck is just ahead. 

As soon as I arrived, the breezy day turned to a brief but torrential rain. I welcomed the cooling and powerful rain. 

I hate selfies - but was so proud to be at the top

Which reminds me, in the West Virginia ridges I have learned that you can't see the weather coming. Brief rain showers can pop up very quickly. If there is any chance of rain in the forecast, it would be good to pack a rain poncho when hiking. 

Would I recommend this hike to anyone who likes the great outdoors. YES! The river at the bottom, the view at the top, and the wooded area in between is a peaceful and beautiful place. Bird watchers would have plenty to see (I could hear the variety of birds chirping but can't identify birds by song). 


Location of the observation deck

Related Links:

I took many photos. I have posted those photos here if you would like to see them. 

Monongahela National Forest and Seneca Rocks website; including the hiking trail map  (I still feel like there were far more than three switchbacks. Whew!)

Seneca Rocks Discovery Center and the Sites Homestead. I was pleased to learn that tours of the Sites Homestead are available through the Discovery Center. I hope to include a tour as a part of my next trip to Seneca Rocks.


*This article may contain affiliate links. If you shop via one of the affiliate links, I may earn a small commission - at no additional cost to you. I am very appreciative of every reader who visits my articles. Thank you.


Travel: My Seneca Rocks Hike in Photos

Seneca Rocks, West Virginia is a small community in West Virginia and a rock formation with both a rich history and a current popular tourist attraction. I have wanted to hike the Seneca Rocks trail since first driving past the site a few years ago. 

I am very happy to share that I made the hike this past week. You can find the written version on my post here.  But in this post I am going to do the "show" portion of my Seneca Rocks show-n-tell.

Note: The introduction photo/historical marker is provided courtesy of wikimedia commons via CC-BY-SA-4.0 Famartin. All other photos are my own. 


Seneca Rocks Discovery Center Area


There are two separate parking areas. One is at the Seneca Rocks Discovery Center and the other is the Sites Homestead and picnic area. Both are connected by a short trail and a bridge. These photos are from the Discovery Center area.


Sites Homestead and Picnic Area at Seneca Rocks


The Sites Homestead and Picnic area is the parking area closest to the trail head. A bridge crosses a river and the trail to the top begins. 

The picnic area includes a small covered pavilion, a rustic restroom, and the historic Sites Homestead and gardens. From this vantage point, the observation deck at the top of the trail can be seen. 


Seneca Rocks Trail


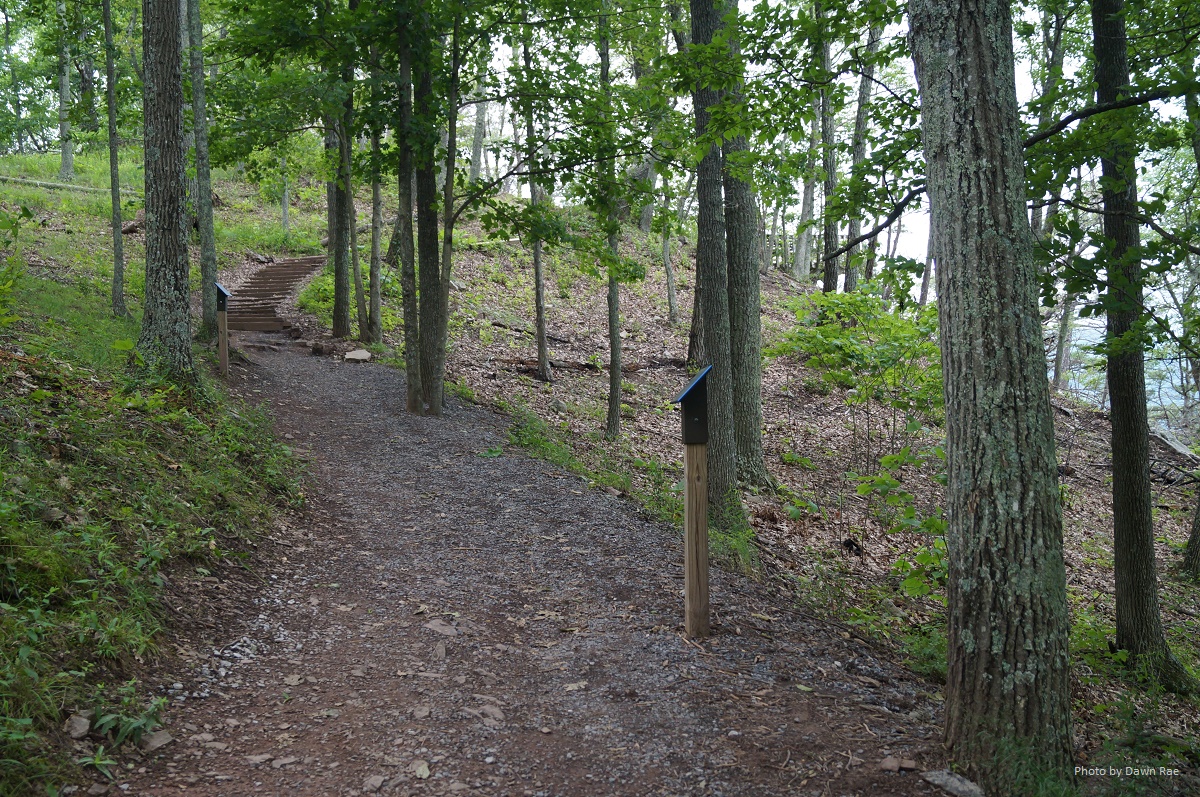
The trail heading up. At first it began almost flat. A deceiving portion of very easy trail. To experienced hikers, the entire trail would be considered easy as it is a wide and well-maintained trail. But it was challenging to me.


When I arrived at these stairs, I nearly gave up. I was hot and the trees had stifled any breeze. I pushed myself and made it to the top of the MANY stairs. And I sat on that rock for a good bit of time to rest. 


This is the top of the trail. There is a large sign just beyond this point that warns of the dangers to hikers who continue past this point. Deaths have occurred by the casual hikers not heeding the warnings. As tempting as it was to start climbing the rocks, I opted to remain on solid ground. I did not want to become famous for being the Gramma that fell off Seneca Rocks.

Yes, it rained as soon as I got to the top. But the rain was cooling and brief.


The walk down was faster than the climb up. But by then I was so relieved to arrive at the river... which meant I was only a few more steps away from the bathroom and then the cushioned seat of my Jeep. 


As I exited the area, I took one more look back. What a wonderful adventure this was. 


*This article may contain affiliate links. If you shop via one of the affiliate links, I may earn a small commission - at no additional cost to you. I am very appreciative of every reader who visits my articles. Thank you.

Saturday, September 23, 2017

Reviewing the Anker Portable Solar Power Charger

The ease of portability with the Anker PowerPort.
I have found a treasure that is not so very expensive but is worth it's weight in gold if you need to charge your cell phone and have no way of doing so. The Anker 21 watt PowerPort is portable, small, and powerful.  If you go camping, hiking, or if you want to be prepared for power outages at home, you may like this solar charger as much as I do.


The Anker 21 watt PowerPort Solar Charger


This little charger can be kept in the seat pocket of your car, in a hiking backpack, your bug out bag, or many other small storage spaces. The four sections of the gadget fold up like a pamphlet. The velcro holds it closed.  When folded it measures only 11" x 6".  When fully opened it measures only 26" x 11".

When opened, you access the pocket with the USB port. The PowerPort has two ports so you can charge two items at a time. The PowerPort comes with one charging cord. I could charge my Kindle and my cell phone at the same time.

As soon as you open the Anker PowerPort Charger, you can immediately see if the item is collecting sun via the indicator light. 


Anker PowerPort with 2 USB ports, indicator light, and cord included

As soon as I received my Anker, I took it out to the balcony to give it a try.  It was an extremely sunny day. Even so, the charger charged my phone far more quickly than I expected. I've never timed it, but I believe it takes longer to charge when it's charging in the Jeep up at the Shack! I know it seems like forever when I am waiting to bed but I want a full charge on the phone for overnight.


4:54 pm - Charging at 62%


6:02 pm  - Charging at 81%

The Many Uses of the Anker PowerPort Solar Charger


I bought this on the recommendation by a friend who has owned his for a year or more.  He uses his for camping, hunting, and traveling. He charges his items while in the woods or while in the truck without putting strain on the truck battery. He has not had a single complaint with his Anker. 

I bought mine for hiking and camping purposes as well as power outages that occur in the neighborhood where my metro apartment is located. I will also take mine with me when I travel to the Shack. Even though I have a large solar panel and inverter there, I need to replace the donated batteries (which are expensive). So in the meantime, I can use the Anker to charge my phone (rather than take my phone out to the Jeep in the dark and the wilderness and charge it there). 

I did see some questions on Amazon and I want to make it clear... this is not an inverter. You cannot charge items with "plugs" with this. You can only charge things that can charge with a USB cord. That includes phones, kindles, and tablets. Maybe some cameras. If you item plugs in with the cord that fits into the hole shown in the photo above, you can use this mini-solar panel to charge your items. 


I occasionally lose power in my apartment for most of day due to things such as traffic accidents hitting power poles and those big power boxes. We have also lost power here due to ice storms and blizzards. Finally, with the recent news of the damage caused by hurricanes, I made sure I am more prepared with the Anker PowerPort Solar charger. 

UPDATE: After using this item a handful of times, I highly recommend it. It is a very helpful item when either off-grid or experiencing power loss. I do want to add that there is one thing to be aware of. It does NOT have a diode. Which means that if you leave your phone plugged in to the charger and it becomes too cloudy or dark, the power from your phone drains back into the solar charger. I would not expect an item this inexpensive/portable to have a diode. But it was interesting to watch just how quickly the power drains in the opposite direction in the dark.

*This article may contain affiliate links. If you shop via one of the affiliate links, I may earn a small commission - at no additional cost to you. I am very appreciative of every reader who visits my articles. Thank you. 

Related Link:


I also depend on headlamps for lighting at the Shack, while camping, hiking, and during emergencies. You can read my review of headlamps here. If you've ever suddenly been in the dark and needed lighting you are aware of the importance of light. Read about my choice for hands-free lighting.